How to create SQL coding labs?
Codedamn supports creating SQL coding labs. This document would list down steps to create an interactive AWS Sandbox.
Introduction
This guide would assume that you already have created an interactive course from your instructor panel. If not, go here and set it up first
Step 1 - Creating lab metadata
- Add a new item lab in your course curriculum page
![]()
A new lab item gets added. Click on the edit pencil button on the right. This should open the lab library widget in your instructor panel.
You should now be able to write a quick lab name and press on "Create Lab" button. This would create a lab you would be able to edit.
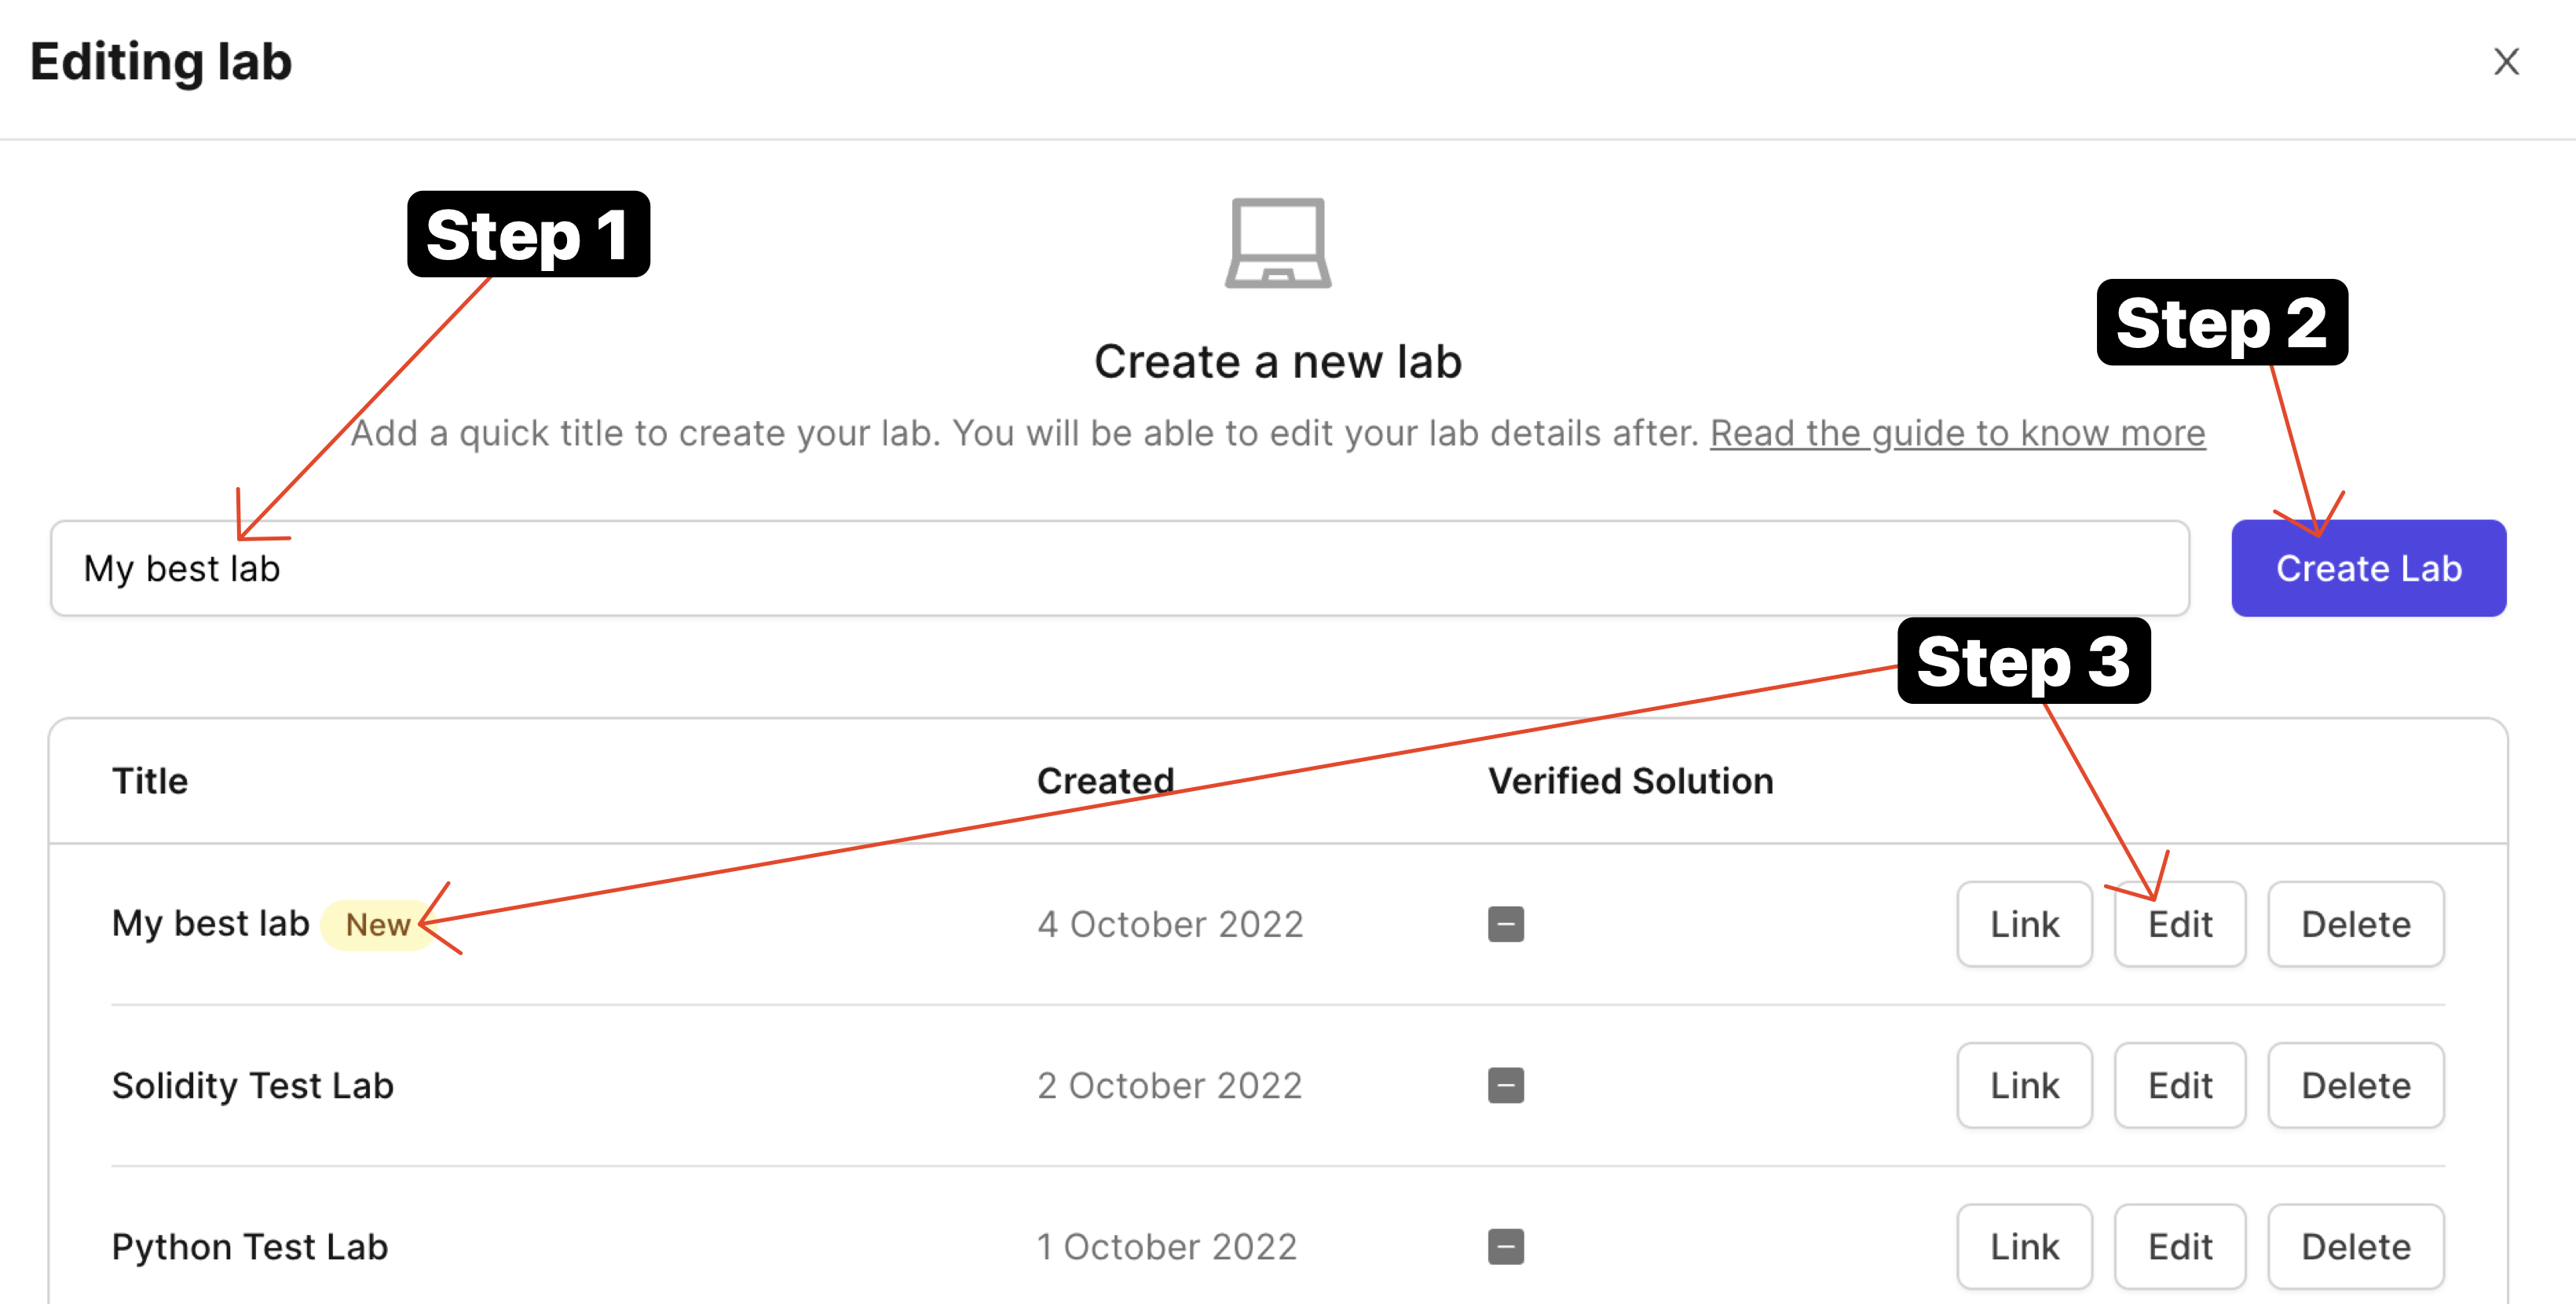
- Once it is created, click on the "Edit" button and you'll arrive at lab designer view.

This is where you will add metadata to your labs and setup your labs for evaluation. Let's take a look at all the tabs here.
Step 2 - Lab Defaults
For creating an SQL lab, you need to provide a database script written in JavaScript. Codedamn uses better-sqlite3 to run SQLite adapter using Node.js.
Fork this repository here and modify the seed-db.js file. Use this as your default repository: https://github.com/codedamn-classrooms/sqlite-default-template
Codedamn currently supports SQLite. This seed script is ran right before giving the practice playground to the user hence you can prepare your database in the script.
Here's how your seed script should look like:
// Import better-sqlite3 and create a database connection
import Database from 'better-sqlite3'
import fs from 'fs'

// Reset database
const databasePath = './database.sqlite'

if (fs.existsSync(databasePath)) fs.unlinkSync(databasePath)

const db = new Database(databasePath)

// Seed your database here. For example:

// Create a table
db.exec(`CREATE TABLE users (id INTEGER PRIMARY KEY AUTOINCREMENT, name TEXT NOT NULL)`)

// Insert data
db.prepare(`INSERT INTO users (name) VALUES ('Alice')`)

// Close the database
db.close()Step 3 - Lab challenges
Next step is to setup challenges and evaluation for your lab. This is the part where your learners can learn the most because they will have to pass certain challenges.
TIP
It is highly recommended for you to watch the video below to understand the architecture
This is the biggest advantage of using codedamn for hosting your course too - to make them truly interactive and hands-on for your users.
Let's start by setting up challenges.
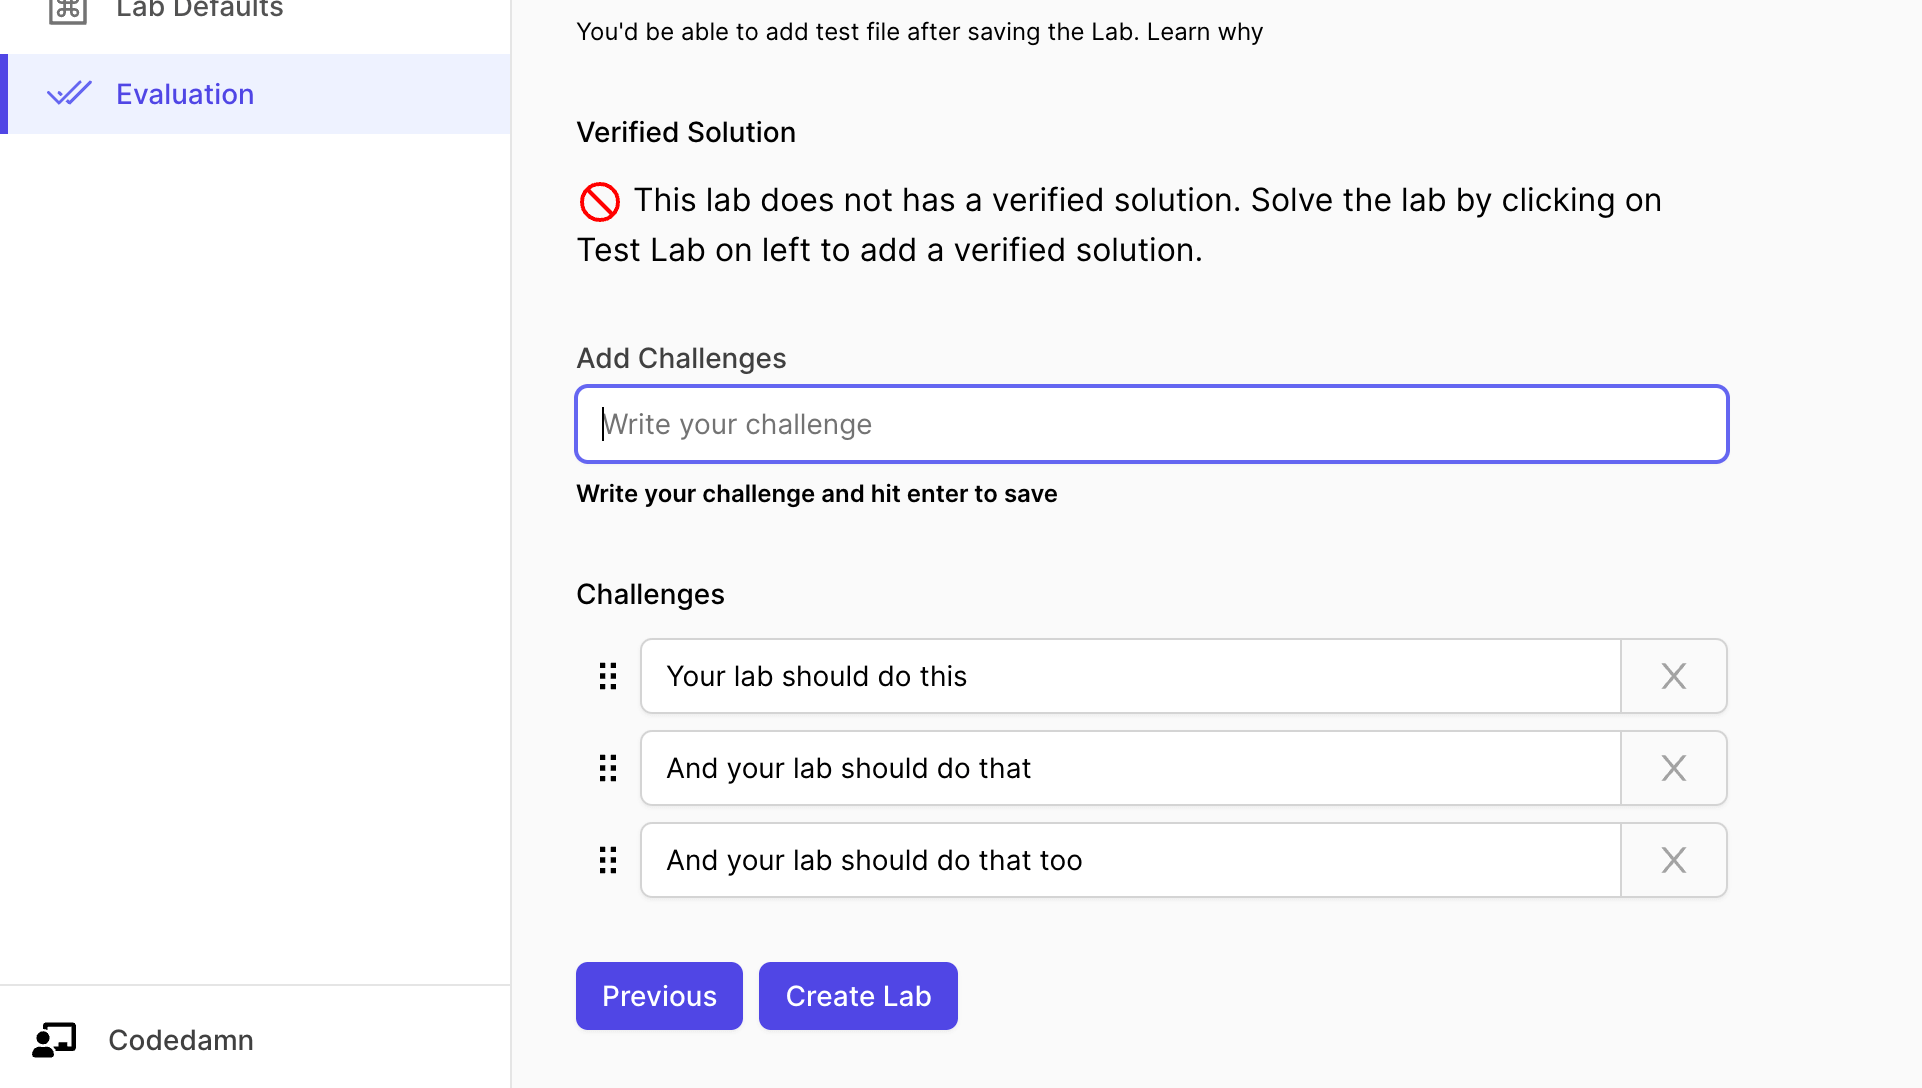
The interface above can be used to add challenges to your lab. You can also add hints to every single challenge you put here.
TIP
When the user runs the lab but fails a few challenges, the hint for that particular failed challenge is displayed to the user.
Step 4 - Evaluation script
In order to evaluate your challenges, you can one of two things (or both):
- Directly access database file and check if relevant table, columns, etc. exist.
- Access content of the SQL query user has written (almost always a SELECT query), execute it and compare the result with your answer query.
Let's assume you have the following lab challenges:
- Create a table called
quoteswith only one column namedquote - Insert at least 5 random quotes in this table.
- Write a query that gets all quotes that start with the letter
t
Here's how a test file would look like:
// Import better-sqlite3 and create a database connection
import Database from 'better-sqlite3'
import fs from 'fs'
import assert from 'assert'

// this depends on which file you asked the user to write in
const databasePath = '/home/damner/code/database.sqlite'
const db = new Database(databasePath)

const results = []

try {
    db.exec('select * from quotes limit 1;')

    // quotes table exist
    results.push(true)
} catch(error) {
    console.error('Could not pass test', error)
    results.push(false)
}

try {
    const quotes = db.prepare('select * from quotes limit 5;').all()

    assert.equal(quotes.length, 5)
    results.push(true)
} catch(error) {
    console.error('Could not pass test', error)
    results.push(false)
}

// test from solution file
try {
    const userQueryFile = '/home/damner/code/query.sql'
    const userQuery = fs.readFileSync(userQueryFile, 'utf-8').trim()
    const userOutput = db.prepare(userQuery).all()

    const solutionQuery = `SELECT * from quotes where quote like 't%';`
    const solutionOutput = db.prepare(solutionQuery).all()

    assert.deepStrictEqual(solutionOutput, userOutput)
    results.push(true)
} catch(error) {
    console.error('Could not pass test', error)
    results.push(false)
}


// write the results array boolean. this will map to passed or failed challenges depending on the boolean value at the challenge index
fs.writeFileSync(process.env.UNIT_TEST_OUTPUT_FILE, JSON.stringify(results))Best practices:
- Try to keep SQL labs single-challenge only. Either test only the
SELECTlogic or only the logic where labs test how they create a database/table/data. - If you have a lab that requires multiple challenges, ask user to comment all SQL commands (
INSERT, etc.) and keep onlySELECTstatements in the code to keep testing simpler.