How to build DSA/Competitive Programming labs with I/O Testing?
I/O Labs makes it easier to setup up tests and labs for basic Input / Output based testing. It is very useful for functional testing where the output is converted to text and compared with the expected output.
codedamn's I/O labs offers the best-in-class experience for creators to setup a text based testing lab in minutes. The creators does not need to worry about spacing with inputs and outputs for a given test case as outputs are generated based on the solution written by you. This is makes it faster and easier to setup on I/O Labs on codedamn.
Creating a new I/O Lab
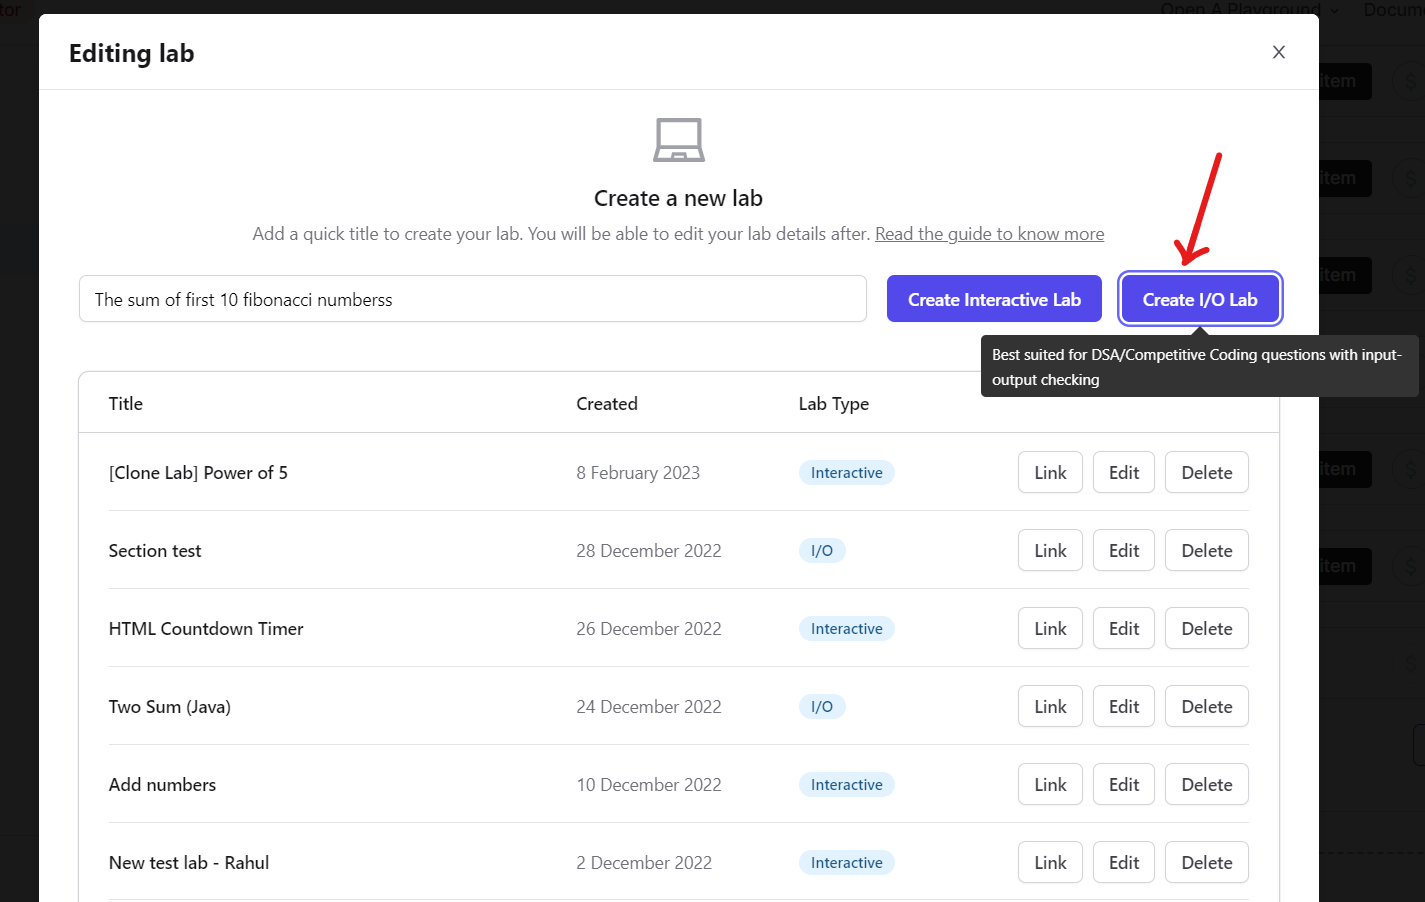
1. Create a new I/O Lab
On the curriculum page, clicking on the "+ lab" button under a section of the course will create a new lab lesson in the section. Now clicking on the edit button will open a new modal for you to create a new I/O lab and linking it to the existing lesson. You can enter the title of the lab and click "Create I/O lab"
2. Link the I/O Lab
The new I/O Lab will now be available in the list of the labs that you've created on your account, now click on the "Link" button to link your I/O Lab with the lab lesson.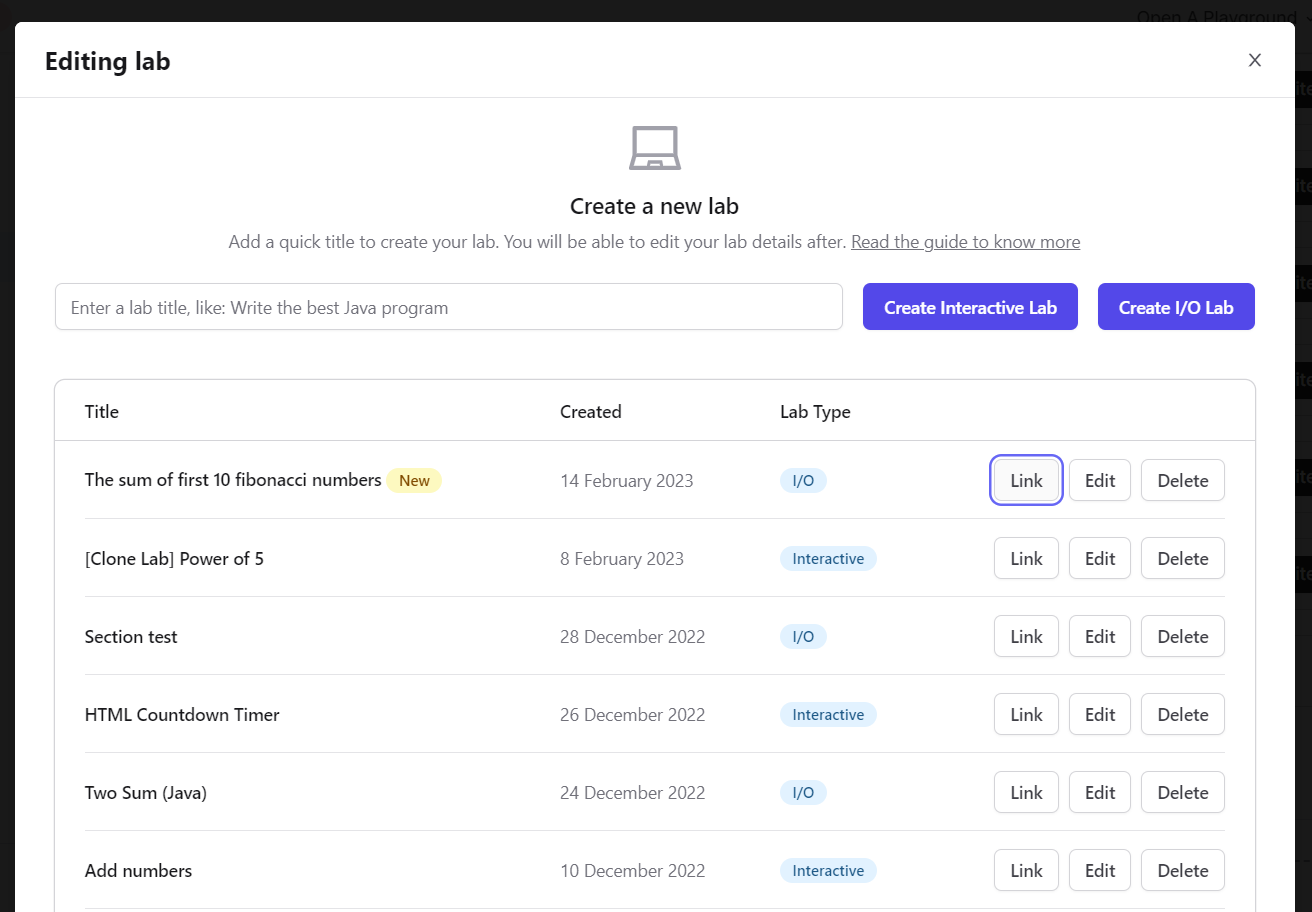
3. Setup Instructions for the Lab
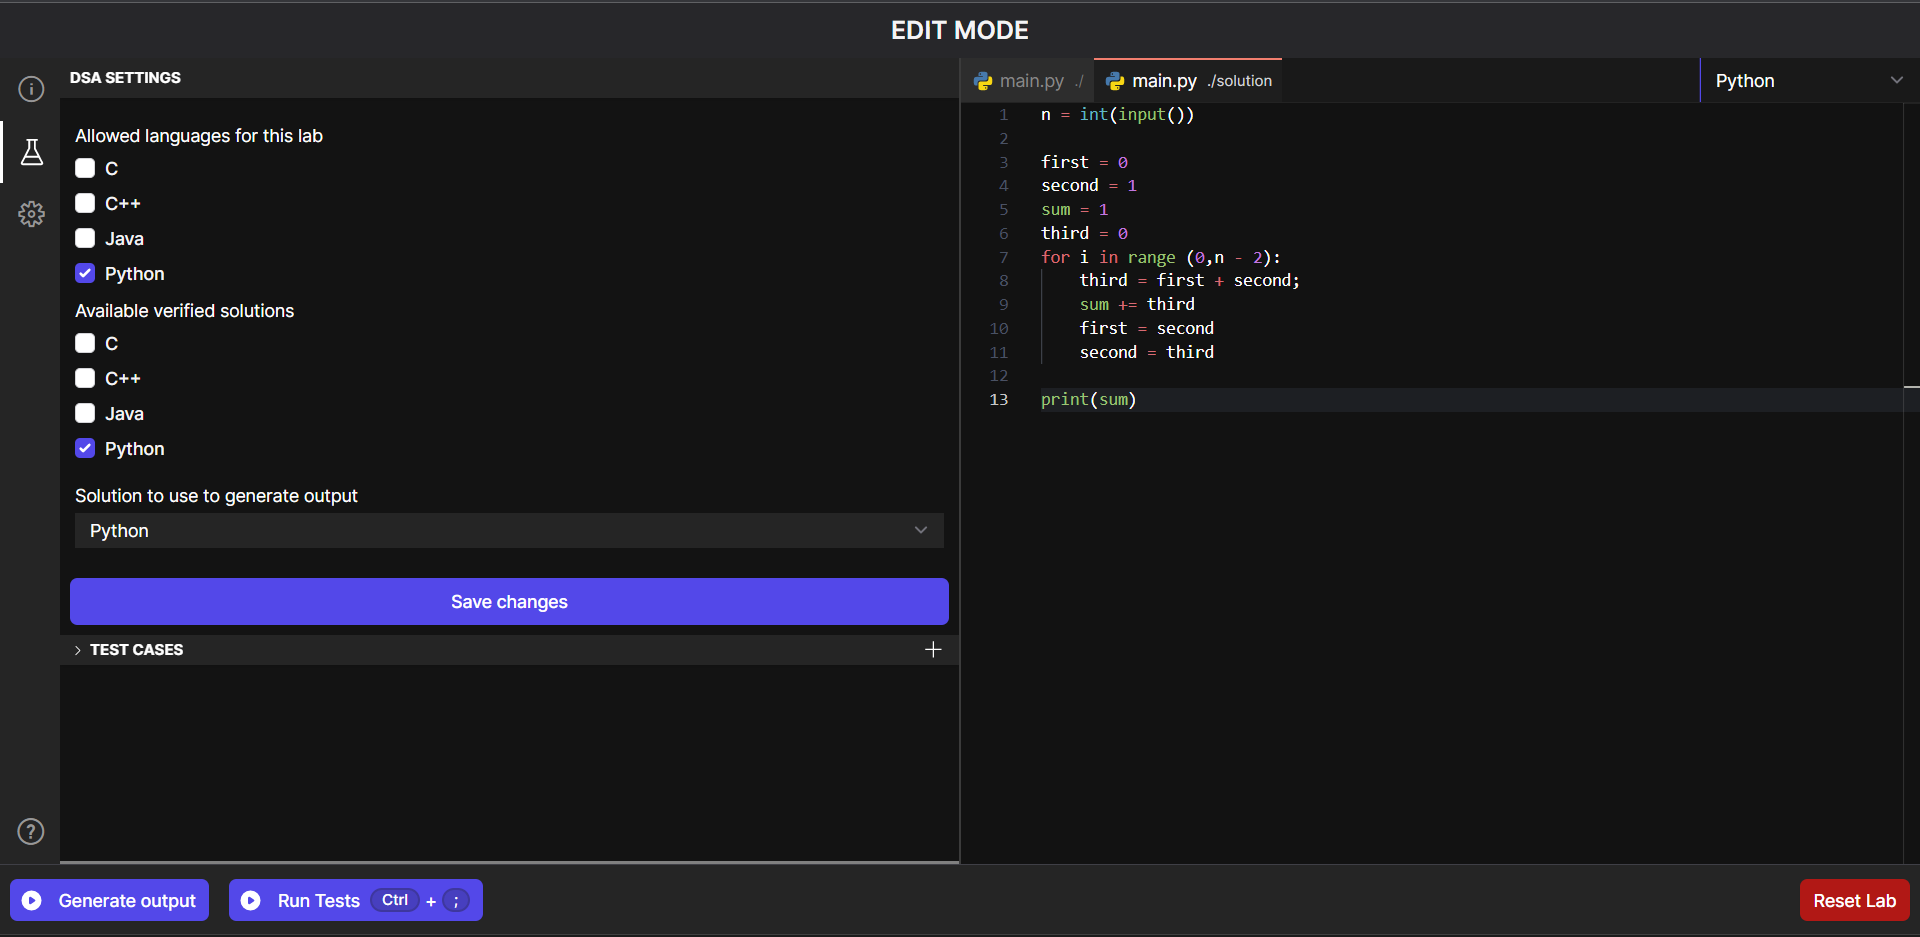
Clicking on the edit button will open up the edit mode of the I/O Lab, this will give you the complete functionality to setup and test your lab.
Here's how the edit mode will look like.
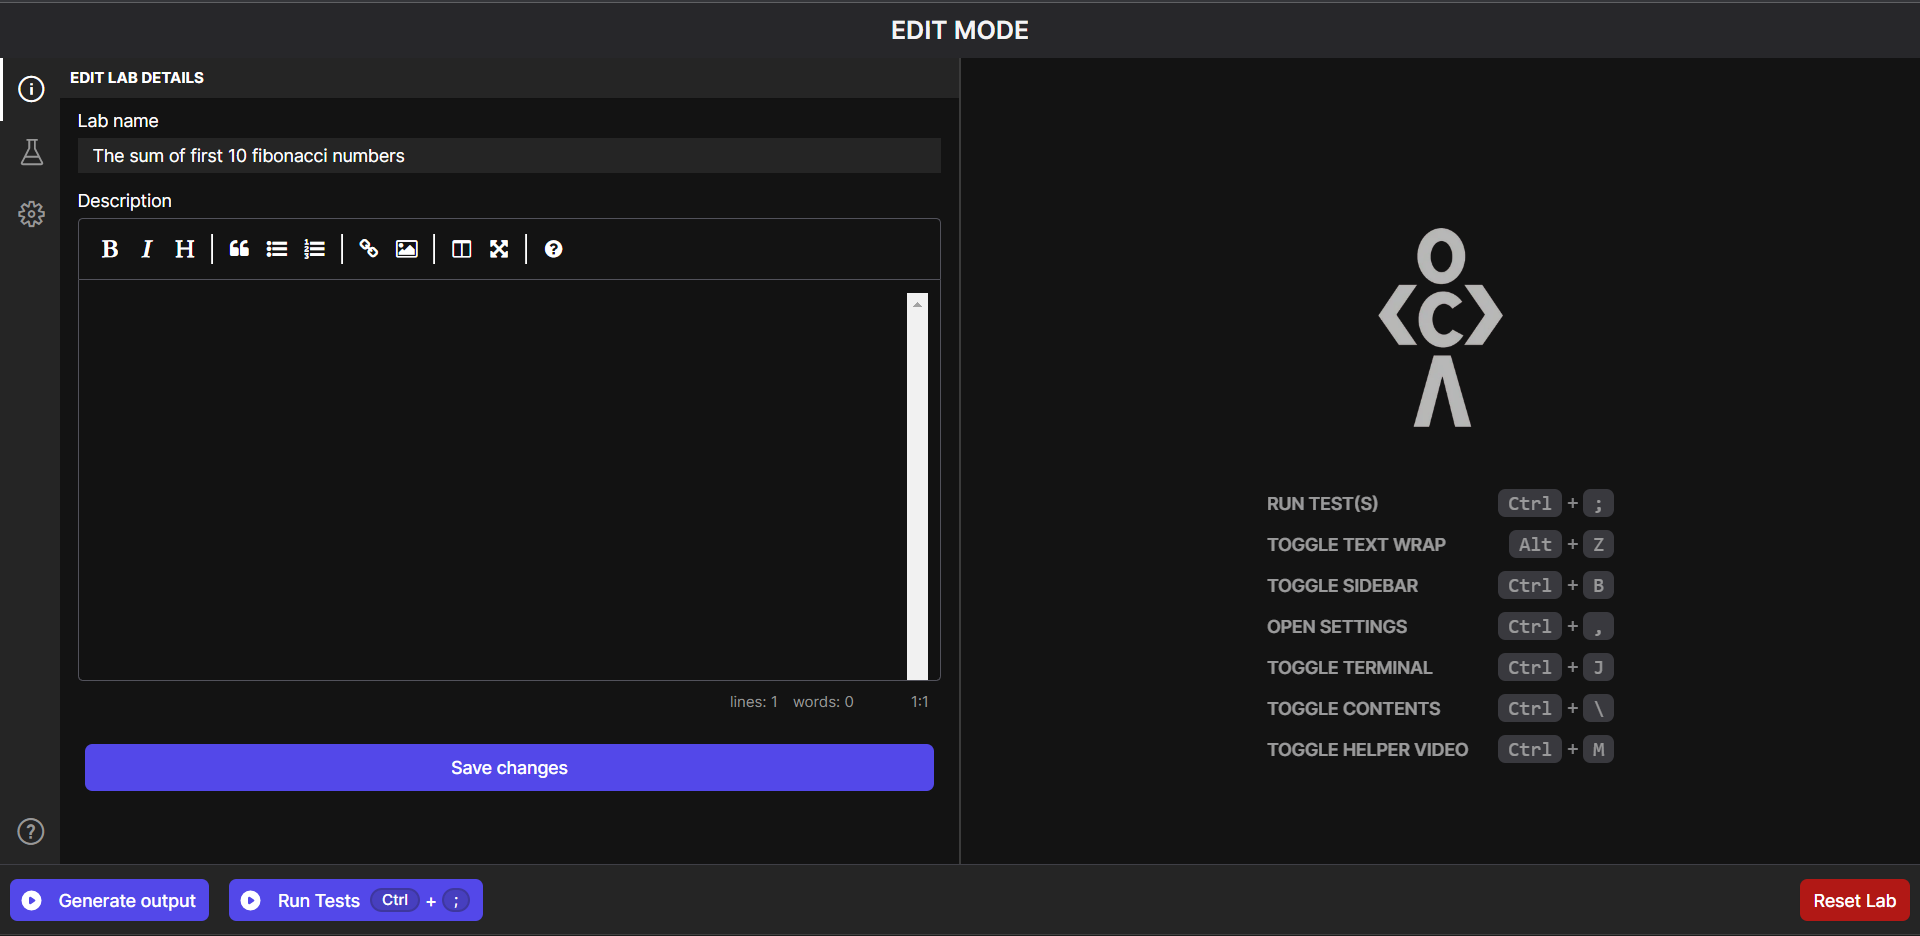
You can use the description area to setup the Instructors for the lab. Mention all the required details to complete the lab and click on save changes to update them.
4. Setting up languages
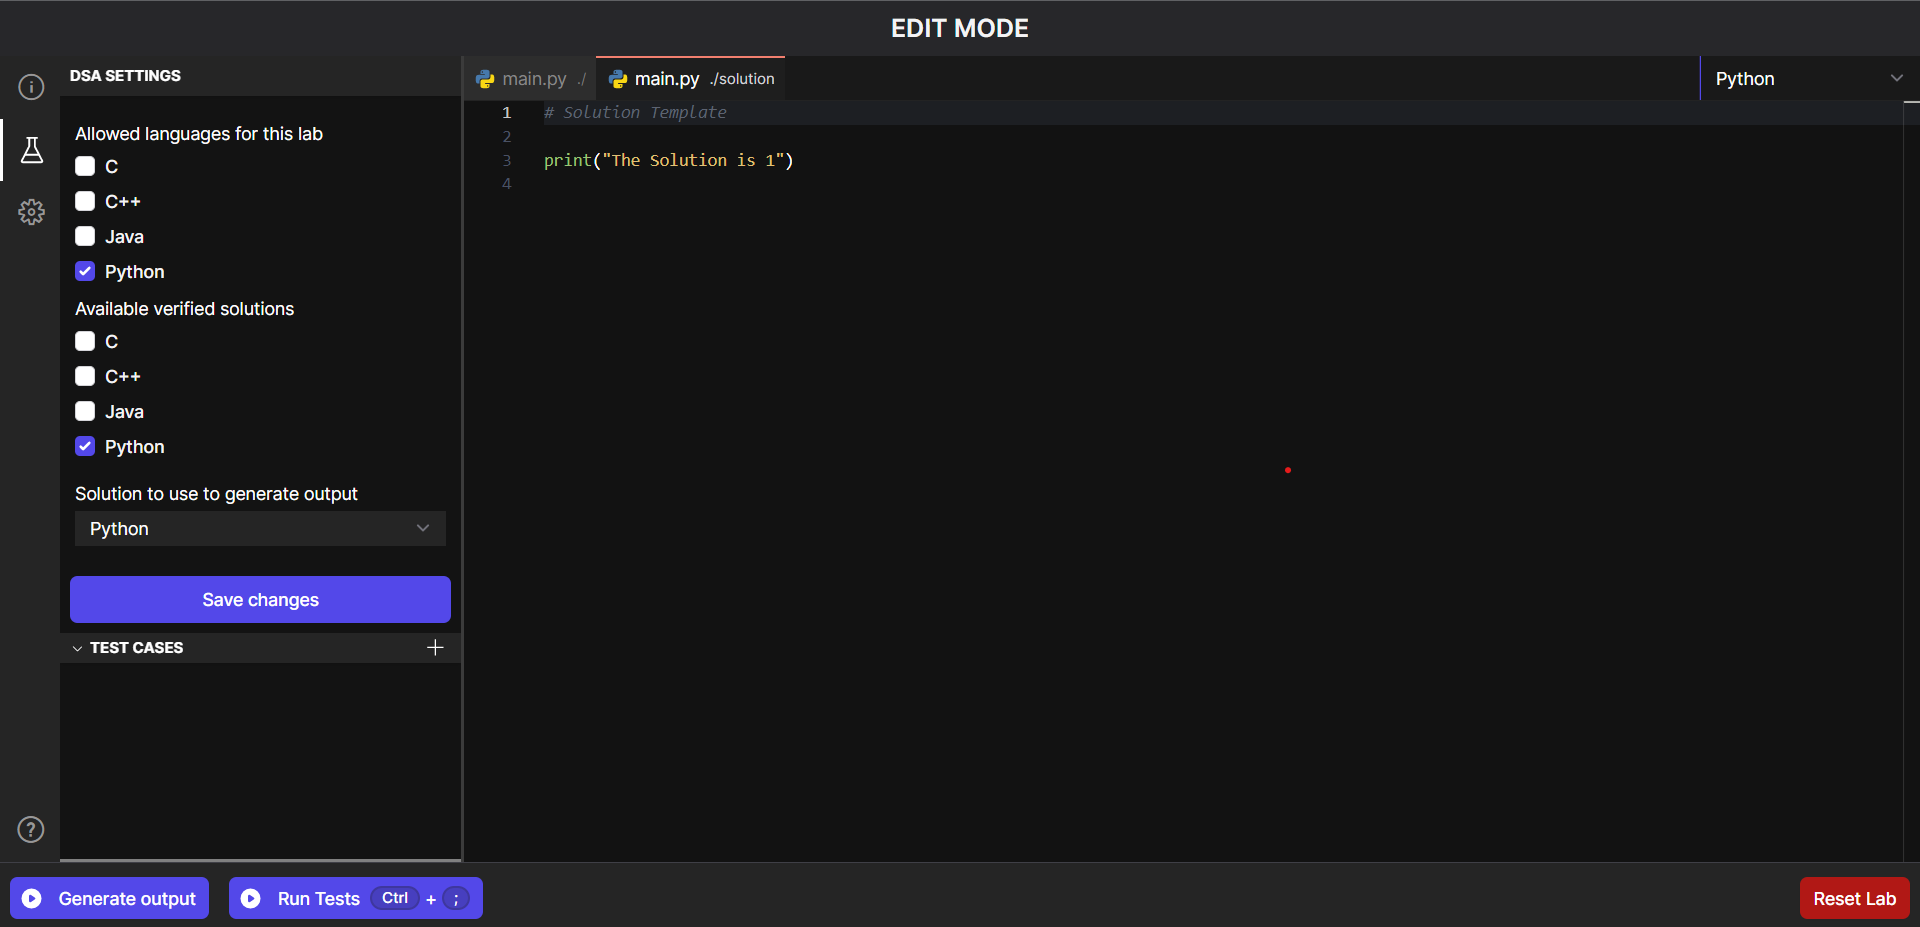
Clicking on the lab icon in the sidebar of the I/O Lab will take you to the most important part of the lab. Selecting Languages for the Lab.
You would see a two set of options in the sidebar. The first set Allowed Languages - are the set of the languages that the student will be able to solve your lab in. You can check all the languages, if you wish to provide the option for the student to write code in any language.
If you're creating a course on the specific language, make sure to select the applicable language only.
The second set of options Available verified solutions - decide in which languages the verified solution will be written in. As a creator you choosing one language here is enough, however if you wish to write a solution in all available languages, you can do it.
The last input item of this section would be Solution to generate output - this is an important part of the I/O. Here you're determining which verified solution should be used to generate the output for the test cases in.
We'll be selecting Python for this guide.
You would see that a two new files have opened up on your right side of the screen as soon as you've select the verified solution.
5. Setting up verified solution
Once you've selected the languages for the verified solution, you should be able to see two files in the text editor on the right side of your screen.
Both of the files will be having the same name, but one file would be part of the solution folder like solution/main.py. This file would contain the verified solution for the challenges. Now it's time to write the solution for the challenge
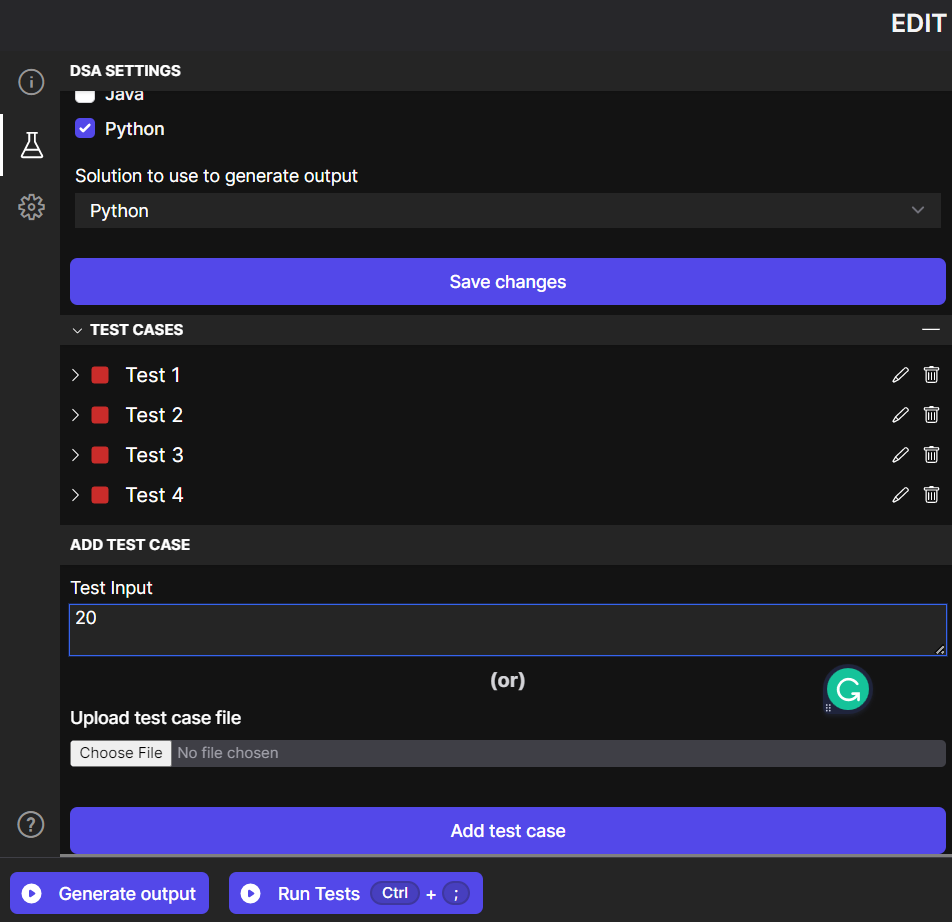
6. Setup test cases
Now that we are done with the verified solution, setting up the test cases in the next step to get your I/O Lab ready.
You should be able to see a + (plus symbol) beside the test cases section. Clicking on the + will give you a new text box to give in the input values.
If you're case requires a large input set (which can be very hard to copy/paste or type on your own) we allow our creators to update the inputs using a text file. All files that have UTF-8 encoding format.
If the test cases are simple to set up you can set them up normally by typing in the text area.
7. Generate the output for the test cases
Now that the verified solution is written and the test case's inputs are written. It's time for us to generate the output of the test cases. Clicking on the Generate Output button will generate the output for all the test cases that you have setup.
If there is any error while generating the output, the error message will be shown in the output placeholder of the test case. In that case, you can edit the verified solution and attempt to generate the output again.
8. Setup boilerplate and verify the boilerplate code
You can add some stubs in the boilerplate code to help the student's write the code, once you're done writing this. You can click run tests button to verify that they are no errors caused by the boilerplate code you've written and code does not pass the test cases (the complete solution is not written in the boilerplate code area)